What is clipping path service
What Is a Clipping Path Service? Uses, Benefits, and How to Choose One Professional product images can make or break your online business. Behind most stunning e-commerce photos is a technique called clipping path service – the digital equivalent of precisely cutting around an object with surgical accuracy. This comprehensive guide explains what clipping path services are, how they’re transforming product photography, and why they might be the missing piece in your visual marketing strategy What Is a Clipping Path Service? A clipping path service is a specialized photo editing technique that creates a vector path or shape to isolate a subject from its background. This digital process is similar to cutting out an image with scissors, but with pixel-perfect precision that preserves even the most intricate details. Technical Definition At its core, a clipping path is a closed vector path created in Adobe Photoshop using the Pen Tool. Professional editors meticulously draw these paths around the subject, following its exact contours. Once completed, everything outside this path can be removed or modified, creating a clean separation between the subject and its background. Unlike automated tools that often produce jagged edges or miss subtle details, professional clipping path services rely on skilled human editors who can distinguish between complex edges and ensure smooth, natural-looking results. Types of Clipping Path Services Type Complexity Typical Applications Average Price Range Basic Clipping Path Simple shapes with straight edges Books, boxes, simple products $0.25-$0.50 per image Medium Clipping Path Curved edges with some details Shoes, bags, apparel $0.50-$2.00 per image Complex Clipping Path Multiple holes or intricate details Jewelry, bicycles, furniture $2.00-$5.00 per image Super Complex Path Extremely detailed with multiple openings Chains, nets, complex machinery $5.00-$10.00 per image Multi-Path Multiple separate paths in one image Color correction, shadow creation $3.00-$8.00 per image Not sure which type of clipping path you need? Get expert advice and a free sample edit to see the quality difference professional services can make. Free Trial Common Uses of Clipping Path Services Clipping path services have become essential across multiple industries where visual presentation matters. Here’s how different sectors leverage this powerful editing technique: E-commerce Online retailers use clipping path services to create consistent product presentations across their catalogs. By removing distracting backgrounds and placing products on white or transparent backgrounds, they create a professional, cohesive look that increases conversion rates. Real-world example: Amazon requires all product images to have white backgrounds, making clipping path services essential for third-party sellers. Professional Photography Photographers use clipping paths to isolate subjects for creative compositing, background replacement, or to create magazine-quality cutouts. This technique gives them complete control over the final image composition. Real-world example: Fashion photographers often shoot on simple backgrounds, then use clipping paths to place models against more elaborate settings. Advertising Ad agencies rely on clipping paths to create composite images where products can be placed in idealized settings that would be impossible or expensive to photograph directly. This flexibility allows for unlimited creative possibilities. Real-world example: Beverage companies often use clipping paths to place their perfectly photographed products into lifestyle scenes. Additional Applications Creating ghost mannequin effects for clothing photography Preparing images for catalogs with consistent presentation Isolating products for shadow creation and enhancement Enabling color variations of the same product Facilitating multi-channel marketing across different platforms Benefits of Professional Clipping Path Services While there are numerous photo editing techniques available, clipping path services offer distinct advantages that make them the preferred choice for professional image editing: Advantages of Clipping Path Services Precision and Control: Hand-drawn paths offer pixel-perfect accuracy around complex edges Versatility: Can be used for background removal, shadow creation, and color correction Scalability: Vector paths remain crisp at any size, unlike pixel-based selections Reusability: Paths can be saved and reapplied to similar products Professional Results: Clean edges that look natural and professional Limitations of Alternative Methods Magic Wand Tool: Struggles with complex edges and color transitions Background Eraser: Often creates jagged edges and loses fine details Quick Selection: Less precise for professional product photography Automated Services: Miss subtle details and produce inconsistent results AI Background Removers: Still can’t match human precision for complex products Business Benefits Increased Conversion Rates: Professional product images can increase sales by up to 30% Brand Consistency: Uniform presentation across all product images Time Savings: Outsourcing frees up internal resources for core business activities Cost Efficiency: More affordable than in-house editing for most businesses Technical Benefits Faster Website Loading: Clean images with transparent backgrounds optimize page speed Multi-Purpose Usage: One well-edited image can be used across various platforms Print-Ready Quality: Vector paths ensure crisp edges for both digital and print media Compatibility: Works with all major image formats and design software Experience the quality difference See how professional clipping path services can transform your product images with our no-obligation free trial. Get Quote How to Choose a Professional Clipping Path Service Provider Selecting the right clipping path service provider is crucial for ensuring quality results that enhance your visual assets. Follow this step-by-step guide to find a provider that meets your specific needs: Evaluate Portfolio Quality Examine the provider’s portfolio to assess their technical skill and attention to detail. Look specifically at: Edge quality around complex objects (jewelry, furniture, etc.) Natural-looking results without obvious editing artifacts Consistency across multiple images of similar products Experience with products similar to yours Check Turnaround Times Confirm that the provider can meet your deadlines, especially for bulk orders. Most professional services offer: Standard delivery (24-48 hours) Rush services (6-12 hours, usually at premium rates) Bulk order capabilities (hundreds or thousands of images) Compare Pricing Structures Understand how pricing works and what factors affect costs: Complexity-based pricing (simple, medium, complex paths) Volume discounts for bulk orders Additional services (shadow creation, color correction) Revision policies and potential extra charges Assess Communication and Support Effective communication is essential for achieving your desired results: Availability of 24/7 customer support Multiple communication channels (email, chat, phone) Clear process for providing feedback and requesting revisions English proficiency of project managers and support staff Verify Security Measures Ensure your images will be handled securely, especially for unreleased products: Secure file transfer protocols
How Big Is a 4×6 Photo
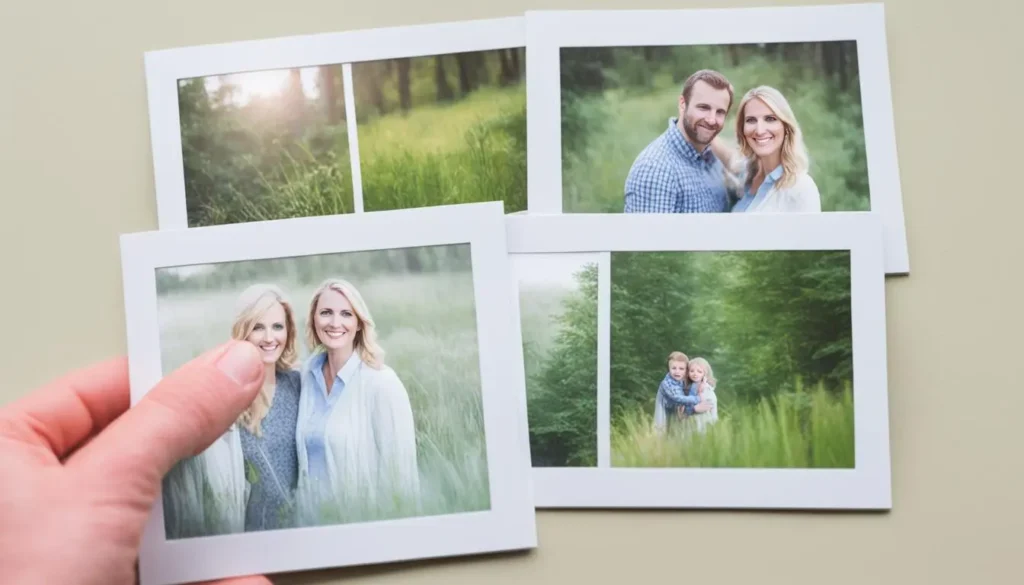
How Big Is a 4×6 Photo? Simple Size Guide The 4×6 photo size is very popular for taking and sharing pictures. But what do we know meaning about in terms of size? We’ll look into the size of a 4×6 photo, its uses, and how to print, frame, and display them. Key Takeaways A 4×6 photo measures 4 inches wide by 6 inches tall, or 10.16 cm by 15.24 cm. 4×6 photos are a popular standard size for printing, sharing, and presentign images. They are commonly used for wallet-sized photos, postcards, and as inserts in photo frames. 4×6 photos can be easily printed at home or ordered from online photo services. There are many creative ways to showcase 4×6 photos, from DIY projects to unique display ideas. What Is a 4×6 Photo Size? A 4×6 photo is a common size for printed pictures. It means the photo width is 4 inches and height is 6 inches. Knowing this size is key when picking out photo products and accessories. Understanding the Dimensions The 4×6 photo size is a top choice for printing, albums, and frames. 2:3 aspect ratios balance shots. This size fits a lot of subjects, like landscapes, portraits, group shots, and more. Common Uses of 4×6 Photos Printing: 4×6 is a popular print size, making it easy to find photo printing services and supplies. Photo albums: 4×6 photos fit well in standard photo album pages and sleeves. Photo frames: There’s a wide range of 4×6 photo frames available, from simple to decorative styles. Show off : 4×6 size is great showing off anywhere. Whether you’re printing, framing, or organizing your photos, knowing about the 4×6 size and its uses can make things easier and more fun. How Big Is a 4×6 Photo? A 4×6 photo is a common size for photos. But what exactly does that mean? Let’s dive into the details and see why this size is so popular. A 4×6 photo is 4 inches wide and 6 inches tall. This makes it 24 square inches in total. It’s a great size for many uses, like wallet photos, standard prints, and albums. Photo Print Dimensions Width Height Total Area 4×6 Photo 4 inches 6 inches 24 square inches Knowing the exact photo dimensions of a 4×6 print is useful. It helps you pick the right products and accessories for your photos. Whether you’re ordering prints, buying frames, or making albums, understanding the 4×6 size is crucial for a perfect fit. A 4×6 photo is the perfect mix of being small enough to handle easily and big enough to show off your pictures well, making it great for all sorts of photo needs. The 4×6 photo is very popular and useful. Its size makes it great for photography and keeping memories safe. Knowing the measurements of this standard photo print size helps you show off your photos well. Printing and Framing 4×6 Photos Printing your memories in the classic 4×6 photo size has many options. You can choose from home printers or professional services. Printing Options for 4×6 Photos If you like printing at home, a 4×6 photo printer is a smart choice These devices are small and user-friendly. They let you print high-quality 4×6 prints anywhere, using specialty photo paper. You can also look into online and in-store photo printing services. They offer great prices on 4×6 prints and many photo products like photo books. There are many ways to display your 4×6 photos. The standard size fits well in various frames, making your photos look great in any setting. Take from classic frames or modern ones. The 4×6 format works well with any décor. Looking to make photo books, print at home, or find the perfect frame? There are many options. With some research and creativity, you can make your photos look amazing for years. Creative Ideas for Displaying 4×6 Photos There are many creative ways to show off your 4×6 photos, beyond just frames. You can try DIY projects or unique displays to make your memories stand out. These aim make your photos alive. DIY Photo Projects Unleash your creativity with these fun DIY photo projects. Turn simple 4×6 photos into unique pieces by using collages, photo transfers, or handmade frames. DIY lets you make each piece fit your style and decor perfectly. You can make a awesome picture 4×6 prints in a grid pattern. Breathe new life into old 4×6 photos by deco paging them onto wooden blocks or canvases. Design your own unique 4×6 photo frames using repurposed materials like driftwood or vintage window panes. Unique Photo Display Ideas Want to make your 4×6 photo display stand out? Check out these innovative ideas that go beyond frames. Get a 4×6 photo album or some photo sleeves to keep your pictures organized and together. Hang a double picture frame to display two 4×6 photos side by side. Incorporate 4×6 photos into your holiday decor, like using them as ornaments or inserts in Christmas cards. Create a personalized 4×6 photo book, perfect for highlighting your favorite memories. 4×6 photos are versatile and can be turned into art with a little creativity. You can make these classic snapshots into beautiful pieces that highlight your life’s special moments. Conclusion 4×6 photo is a accessible size. It’s great for printing photos at home, getting professional prints, or framing your favorite shots. Knowing the dimensions of a 4×6 photo helps you pick the right products and make your photos look great. This guide covered everything from photo print sizes to display ideas. It showed how the 4×6 photo size fits into the world of photography. By knowing the standard photo dimensions, you can make sure your 4×6 inch photos look their best when printed, framed, and displayed. With this knowledge, you can take and show off your memories in a beautiful way. Whether you’re a pro or just taking photos for fun, knowing about the 4×6 photo size helps you make your photos look amazing. Looking
Best Camera For Product Photography
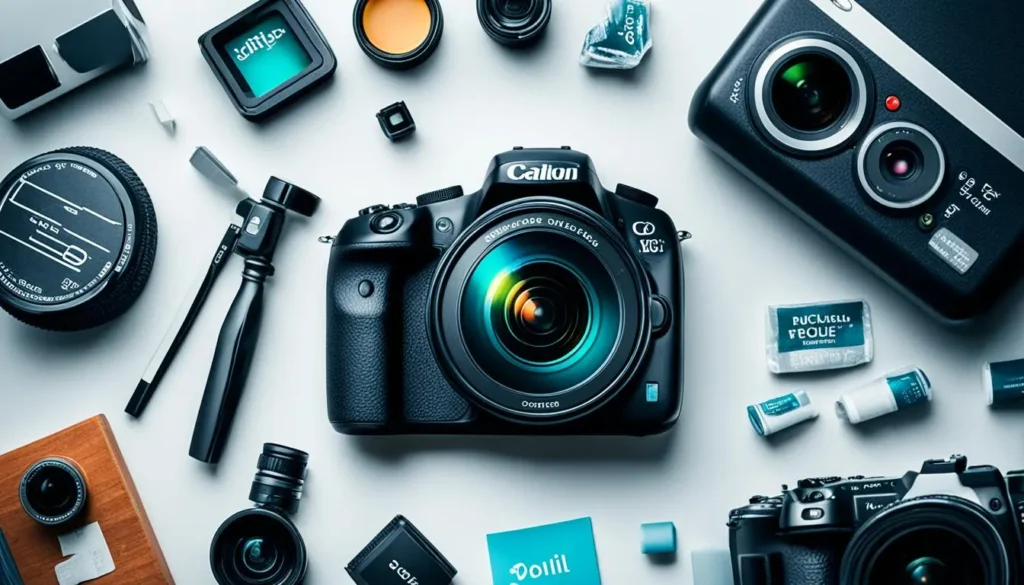
Best Camera for Product Photography: Top Picks For e-commerce and online product showcasing, the right camera is key. This guide will show you the best cameras to improve your product images. It’s perfect for small business owners, e-commerce experts, or professional photographers. You’ll find the perfect camera to make your product shots stand out and grab your audience’s attention. Key Takeaways First select perfect cameras for product shots Understand the key features to consider when selecting a product photography camera Explore the best DSLR and mirror less options for capturing high-resolution product shots Learn about the recommended cameras for e-commerce and studio photography Discover the optimal camera gear for capturing intricate product details and showcasing your merchandise Understanding Product Photography Cameras Finding the right camera is key to great product shots. Product photo is important whether you’re a photographer or a business owner. You need to know what makes a camera good for product photography. Things like image quality, resolution, lens compatibility, and shooting abilities matter a lot. These factors contribute to giving your product photos a polished and appealing appearance. Key Features to Consider When looking at product photography cameras, remember these important features: Sensor size and resolution: Choose cameras with big, high-resolution sensors for detailed and clear images. Lens compatibility: Make sure the camera has lenses you need, like wide-angle for big items or macro for close-ups. Shooting capabilities: The camera should let you control settings like aperture, shutter speed, and ISO for better quality and versatility. Image Quality and Resolution Image quality is crucial in product photography. The best camera should give you high-resolution, detailed photos that highlight your products well. Select cameras with a high megapixel count and advanced photo processing. This makes photo attractive. Knowing what to look for in a camera for product photography helps you pick the right one. So the quality of product photo will improve and attract by audience. Top DSLR Cameras for Product Shots DSLR (Digital Single-Lens Reflex) cameras are top choices for professional photographers. They offer great image quality and many lens options for product photography. We’ll look at some top DSLR cameras for amazing product shots. The Canon EOS 5D Mark IV is a standout. It has a 30.4-megapixel sensor for detailed images. It also has fast autofocus and continuous shooting, perfect for capturing the right moment. The Nikon D850 is another great choice. It has a 45.7-megapixel sensor for amazing detail. It’s known for its great dynamic range and low-light performance. It’s a leading choice among the best DSLR cameras for capturing product shots. Canon EOS Rebel T8i is a better option if you’re on a budget. It has a 24.1-megapixel sensor and advanced autofocus. It’s easy to use, making it perfect for both hobbyists and professionals. These DSLR cameras are all great for taking high-quality product images. They contribute to present your products in the most favorable way. Best Mirrorless Cameras for Product Imaging Photography is always changing, and mirrorless cameras are now a top choice for product shots. They are small, light, and offer both portability and versatility. This makes them perfect for taking great product photos. Portability and Versatility Mirror less cameras are easy to carry because they’re much smaller than DSLRs. This lets you move around your product easily. They’re great for shooting on location or when you need to get the perfect shot fast. They’re also very versatile. You can swap lenses to match the subject you’re photographing. Whether it’s a wide shot or a close-up, you can adjust your camera to meet your needs. Mirror less cameras become popular worldwide. Their compact size and versatile lens options make them a top choice for capturing high-quality, professional-looking product images.” For product photography, the Sony a7 III, Fujifilm X-T4, and Panasonic Lumix S5 are great choices. They have excellent image quality and advanced features. These cameras are perfect for making your product photos look amazing. Recommended Cameras for E-Commerce Photography For e-commerce businesses and online sellers, the right camera is key. It’s vital to capture high-quality images to show off your products and draw in customers online. Here are some top cameras for e-commerce photography: Sony a7R IV: camera comes with 61-megapixel sensor for perfect picture quality. It’s compact and has great autofocus, perfect for e-commerce photos. Canon EOS R5: Known for its high resolution and advanced features, the Canon EOS R5 is great for detailed product shots. It has a 45-megapixel sensor and can handle video too. Nikon Z7 II: The Nikon Z7 II is a strong full-frame camera with excellent image quality and performance in low light. It’s a solid choice for e-commerce photos. When picking a camera for your e-commerce photos, look for high resolution, true colors, and easy controls. These features help enhance your product images and attract buyers’ attention. Using these recommended cameras can boost your product photography quality. This makes your online listings look great and highlights your products in the best way possible. Best camera for product photography Finding the right camera is key to great product images It’s crucial for both professional photographers and e-commerce owners. A great camera can make your objects look amazing. Let’s explore the top cameras designed for this task. The Sony a7R IV stands out as an excellent choice for product photography. It features a 61-megapixel full-frame sensor for capturing clear, detailed images. . It also has great autofocus and performs well in low light, making your photos sharp and lifelike. The Canon EOS R5 is another favorite for product shots. It is one of the best camera in present market with 45-megapixelc full-frame sensor and has amazing features like in-body image stabilization and can record 8K video. It’s known for its accurate colors and wide range of colors, perfect for showing off your products. Who want something easy to carry, The Fujifilm X-T4 is great for them. It takes great photos and is light enough to move around easily It’s well-suited for both product
7 tips for taking great pictures of your companys products

7 Tips for Best Product Photography Did you know that 67% of consumers look at product images before buying? In today’s online shopping world, professional product photography is key. It can make your sales soar. Eye-catching photos are more than just pretty pictures. They are a powerful way to get people interested and increase sales. With the right skills and tools, anyone can take great photos. These photos can grab the attention of potential customers and make your brand stand out. So, let’s dive into the 7 tips for taking the best product photos. Key Takeaways Product photography significantly influences consumer purchasing behavior. High-quality images enhance online product listings and printed materials. Even beginners can achieve professional results with the right techniques. Great product images help to building a strong brand reputation. Learning how to take product photos can drive higher engagement and sales. Understanding Product Photography Basics Learning the basics of product photography is key to taking great pictures. These images should show off your products’ best features. We will talk about the importance of good lighting and the right equipment for the job. Importance of Good Lighting Good product photography lighting does more than just light up your product. It highlights its best parts and hides any flaws. Natural light gives a soft, even look but can change a lot. Artificial light can give you all control and is consistent. Choosing the Right Equipment Choosing the right product photography equipment greatly affects your photo quality. You’ll need a good camera, versatile lenses, and a sturdy tripod. Pick your gear based on what you’re photographing. Here are some key product photography tips and tricks for picking the right equipment: Camera: Get a camera with high resolution and adjustable settings. Lenses: Use macro lenses for small items and wide-angle lenses for big ones. Tripod: It ensures your camera stays still for sharp, clear shots. Setting Up Your Product Photography Space Having a dedicated space for your product photography can make your work better and keep your shots consistent. Think about these key points when setting up your space: Ample Space: Make sure you have enough room to move and adjust your gear easily. This lets you try different angles and views, which are important for great product photography composition. Neutral Backgrounds: Use backgrounds that are neutral or plain to focus on the product. This makes editing easier and keeps your photos looking professional. Neutral backgrounds are a top tip for product photography because they give a clean look. Avoid Clutter: A clean space helps keep your photos consistent and reduces distractions. It lets you show the product in its best light, adding to a smooth product photography composition. Organizing your photography area well can make your product photography smoother. This is key for branding and selling online, as it keeps all your product images looking the same. Remember these tips when setting up, and you’ll see big improvements in your product photography composition. Using Proper Lighting Techniques Mastering proper lighting techniques is key in product photography. The right lighting can make your products stand out and draw in customers. Explore some methods for the best lighting. Types of Lighting Knowing the different types of lighting is important for various effects and moods in your photos. Key Lighting: The main light that highlights the product’s main features. Fill Lighting: Fills in shadows from the key light for balanced exposure. Backlighting: Adds depth and a professional look by highlighting the product’s outline or creating a silhouette. Lighting Positioning Tips Getting light positioning right is key for showing off your products’ texture and details. Here are 3 basic product photography lighting tips for the best results: Place your key light at a 45-degree angle to the product for natural shadows and highlights. Use diffusers to soften harsh lights and avoid bright spots. Put fill lights on the opposite side of the key light to reduce unwanted shadows. Using Natural Light vs. Artificial Light Choosing between natural and artificial light can change how your product photos look. Both has their own benefits. Natural Light Artificial Light Offers a soft, real look. Provides control over lighting conditions. Ideal for products that look good with natural tones. Great for consistent results and specific effects. Best used during golden hours for the softest light. Allows shooting at any time and in any weather. Selecting the Ideal Backdrop Your choice of a product photography backdrop is key to making your product shine. Think about what your brand looks like and what makes your product special. This will help you pick the perfect backdrop. For soap, white or beige backdrops work great because they let the soap be the star. But, feel free to try different colors and textures to show off the soap’s qualities. For example, a wooden backdrop is great for organic soaps, and marble makes high-end products look luxurious. Here are some top tips for soap product photography when choosing a backdrop: Neutral Colors: Stick to neutral colors to let the product shine. Textures: Pick textures that match the soap, like wood for a natural vibe or fabric for a soft feel. Contextual Backdrops: Putting the product in a fitting scene makes the photo more interesting, like a soap in a bathroom. Brand Reflection: Make sure the backdrop fits your brand’s style for a consistent look. Table comparing backdrop materials: Backdrop Material Best Used For Benefits White Paper All Types Clean and Professional Look Wooden Boards Natural Soaps Rustic and Organic Appeal Fabric Handmade Soaps Soft and Inviting Texture Marble Luxury Soaps Elegant and High-End Choosing the right product photography backdrop can make your soap products pop. It will help to send the right message to your customers. Composition Tips for Professional Product Photos Learning the rules of composition is key for making professional product photos. It’s vital whether you’re aiming to boost your sales on sites like eBay or to showcase jewelry well. Mastering these techniques can
Outsourced photo retouching service for online business

Outsourced photo for editing to grow your online business Outsourced photo for editing to grow your online business With the rapid advancement of technology, the e-commerce industry has been growing rapidly over the past decade. Now, with the ever-increasing customer demand, every e-commerce company wants to outsource their photo editing services. The most important factor in gaining sales in e-commerce depends on the quality of the pictures listed online. Whether the need is for a prolific photographer or an e-commerce business, choosing a professional photo editing service provider can be a daunting task. While product images are not the only reason to sell, companies have to focus on pricing, free distribution, ratings, and more. According to a survey, 75% of people find high quality images to be the most influential factor in their online shopping decisions. On the other hand, it is a fact that 22% of online products are refunded because the original product looks different from the photo. Those content are share on social media platforms. Quality visual content is most likely to go viral. What is meant by outsourcing a photo Editing Service for E-commerce? The product image of any e-commerce company is very important because it targets the customers. The whole presentation process consists of three stages namely pre-production, production phase and post-production phase. Here comes the final stage of photo editing, which including retouching and much more. The next stage of production is the most important because the final product reaches the target customers directly. Any company selling its products online depends on the image quality of its products. It needs to be top notch so that consumers are compelled to buy its products. Here, the importance of photo editing is that e-commerce companies outsource to experts who will provide the ultimate touch of images that reflect the company’s reputation. Reasons for Outsourcing Photo Editing for E-commerce Business Traditionally photo editing is done by the in-house team of many brands or by photo studios hired to take pictures of them. But many e-commerce retailers and brands hire third party agencies because it has so many benefits. When outsourcing works properly with a proper review, it will not only come with cost advantage but also with improved image quality, fast key TAT, scalability and much more. Have a Look Before Outsourcing Editing Services With the advancement of digitalization, the e-commerce industry is evolving like anything else. Since e-commerce is mostly focused on online, any company needs to display their products in such a way that potential buyers can make actual purchases from the site. For this, the photo of the products must be clear, of high quality and can be hassle free when outsourcing the photo editing work to a third party service provider. Below are a few points to consider when regretting photo editing services. Determining Service Requirements Not all photo editing companies provide comprehensive services related to photo editing. For example, some companies specialize in white background services whereas some companies offer a wide range of services like Victor conversion in clipping paths. The reason behind hiring a versatile service provider is that the performance requirements of any business may change at any time. The requirements for photo editing may change if a company collaborates with e-Bay or Amazon. Considering more options It is very important to choose a company that specializes in e-commerce business needs. Although certain industries such as jewelry, textiles, electronics, etc. offer photo editing. So, look for companies that have good experience in photo editing for the e-commerce industry. Checking out Customer Reviews The goodwill of a firm is an important factor that needs to be considered. It is highly recommended for any company to check customer reviews and testimonials. Companies that are more experienced are known to deal with market risk and provide quality services in a timely manner. Cost-Effectiveness Before hiring an outsourcing firm for photo editing services, the most important things that needs to be done is to compare the services of short listed companies. Next, the service provider needs to set a budget before outsourcing the work. Well, it depends on the workload, the amount of editing, the frequency of results and much more. Choosing the right company can be hugely cost effective in this way it yields improved sales. The capacity of the Service Provider Always choose companies that have experience in handling bulk orders and deliver them on time. Even if the company is a small to medium business, there is a high potential for growth in the market. At the moment, surfing with the same outsourcing agency is the most appropriate decision instead of surfing because it is time consuming as well as capital investment. Support Availability and Turnaround Time If the company believes in aggressive deadlines, an outsourcing company can be found. Whether an e-commerce company is looking for an off-shore outsourcing agency of local low water, third party service providers need to ensure availability whenever it is needed. Always make sure that the communication channel should be appropriate so that it does not affect the timing of changes. Security That’s when a company plans to hire a service provider to outsource photo editing work. Whether they upload using a cloud server or an FTP site, quality certification, such as ISO 9001 certification, is a non-disclosure agreement. It’s perfect idea to ask companies about policies and terms. Summarize Outsourcing photo editing is beneficial for your studio bottom line, improving lead time and freeing your studio creators so focus on branding styling and live products in your online shop. Compare outsourced photo editing services by reviewing their existing customers, CSR policies, delivery times, and rejection rates. If they do not provide this information, be skeptical. Ask how long they have to handle a large one-time order, for example, 4000 images. If they say they need a week, they probably don’t have the qualifications and it could be a red flag for outsourcing editing for photographers and high volume studios. Conclusion Although the
